How to Create a Featured Image Using Canva
A featured image is an important part of any blog post. It’s what attracts readers to your article and creates a first impression for the content you’re about to share with them. Creating a great featured image can be difficult, but here are some tips that will help you create featured images using Canva.
GET STARTED WITH A CANVAS
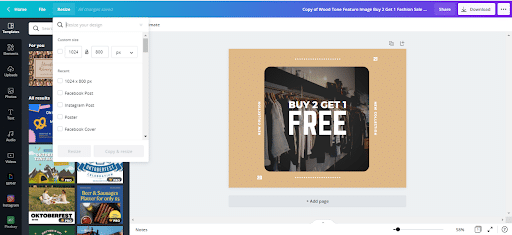
Designing a custom canvas is the first step to creating your featured image. The size you choose will depend on your content management system. If you use WordPress,1024 x 800 pixels is a good size.
To get started with Canva, just click Custom dimensions in the top right-hand corner of their homepage and enter your specs as required.This will give you a fresh canvas to work with.
PLACE YOUR BACKGROUND IMAGE
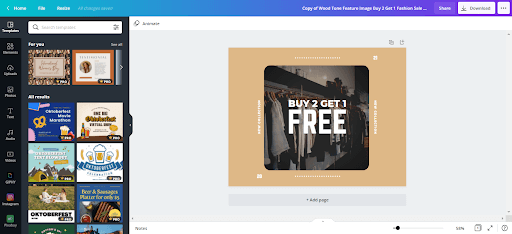
When creating a catchy featured image you should work from the background to the foreground. This gives you more control over all the elements that will make up your design. There are free images available in Canva as well as paid images. You can also upload an image that you have found elsewhere.
If you think about this as a canvas, then the sidebar on the left side of the screen can be seen as your palette. This is where you have preset templates which are basically backgrounds for any theme or idea to help you create an aesthetically pleasing design.
Add an overlay
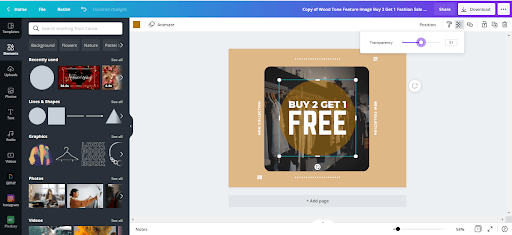
Once your background is set, it’s time to focus on the design of your overlay text. Try adding a translucent layer on top of your image for an interesting effect that will make readers more focused on what you have placed in front – this could be anything from blog title taglines to images and video clips.
Start by clicking on the “Elements” tab to bring up a wide variety of shapes. Select Square and resize it so that it covers your entire canvas, then change its color to dark gray and decrease transparency slightly for an interesting effect.
The best way to find out what the perfect level of transparency is for your image depends on a few factors: type, size, and feel. For example, if you’re using an illustration with bold lines that are hard to see when they’re transparent then 20 would be appropriate as it will make all those details clearer while letting just enough light through for people viewing from afar not have such trouble making them out.
Include some text
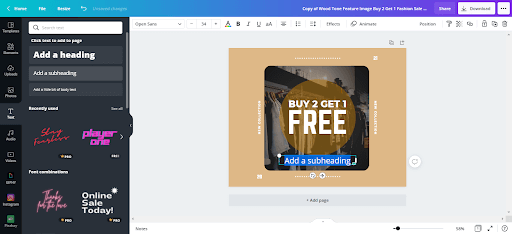
Adding text to a featured image is an excellent way of adding dimension, both aesthetically and in terms of information. It’s the perfect opportunity to add your title, tagline or even author name on top – making it stand out from other posts at first glance.
Click on “Text” to add words to your featured image. You will get two options: either create your own text box or use Canva’s pre-made templates. You can then customize your text with different colors, sizes, fonts, and more. Since you’re creating a featured image, a good size font to use is 42 or higher, to make it readable on different types of devices.

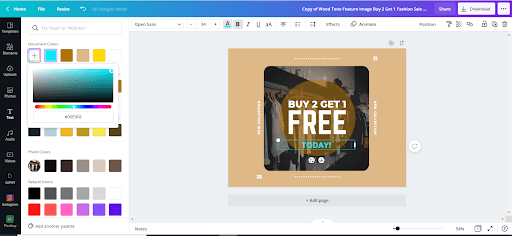
The colors you select should be in contrast with your background. The color gradient tool will help you determine the perfect shade to use. Click the + icon to access this tool.
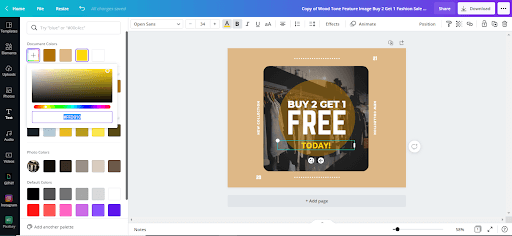
Once you’ve found the perfect font, size and color for your text box in Canva’s layout editor (or if designing a poster by hand), try experimenting with some variations of positioning. Center-aligned is generally best to avoid any confusion but as you grow more skilled at using this app, you can experiment more.
Add your logo or other graphics
Now that you have a beautiful featured image, you can take it a step further by adding your logo or other graphics to make it more authentic.
To add your logo, click on “Uploads” and select the preferred image from your device. Adding a logo to the corner of your featured image makes it more professional and enhances branding across all your articles.
If you want to add graphics click on the “Elements” tab and choose “Graphics”. There are several free graphics that you can use. They have also been categorized under various themes to help you find the best one easily. However, be careful not to overuse them, otherwise, you risk distorting your message.
What size is best for featured images?
For WordPress, the ideal size for featured images is 1200 x 628 pixels. Your theme and blog style is the most important factor when deciding on a size for your featured image.
However, as you’re scrolling through different themes to find what suits you best, remember that squares are going to be your safest bet. Square images will always look crisp and clear no matter how they may need resized or shared across social media platforms later down the line of blogging, so some initial research upfront usually pays off.
Square-shaped images are ultimately more functional than other shapes since there aren’t any corners hanging off where text might overlap with an undesired effect during the stretching or shrinking processes such as uploading onto various sites like Facebook and Twitter.
Place your featured image in WordPress
Now that you have created a new featured image you can upload it to your site. But before clicking “publish,” make sure you optimize your image. Optimizing your picture will enable search engines to rank you higher while making sure site visitors find what they’re looking for quickly too. You’ll need to compress the file to reduce both loading time and the size of files.
Also, when optimizing, you will need to include alt text. Also known as alt descriptions or alt tags, alt text is a description of an image that you can provide when uploading it to the internet. This copy comes in handy if an image does not load on one’s screen. The text also helps search engines to rank your site better and allows screen-reading tools to describe pictures to visually impaired people.
Have a look at this guide to help with optimizing your featured image.